 Summer’s heat, dust, and stop-and-go traffic, will take their toll on your vehicle. Add the effects of last winter, and you could be poised for a breakdown. You can lessen the odds of mechanical failure through periodic maintenance…Your vehicle should last longer and command a higher resale price, too!
Some of the following tips are easy to do; others require a skilled auto technician.
-
Air Conditioning
A marginally operating system will fail in hot weather. Have the system examined by a qualified technician. Newer models have cabin air filters that clean the air entering the heating and air conditioning system. Check your owner’s manual for location and replacement interval
-
Cooling System
The greatest cause of summer breakdowns is overheating. The cooling system should be completely flushed and refilled about every 24 months. The level, condition, and concentration of the coolant should be checked periodically. (A 50/50 mix of antifreeze and water is usually recommended.) DIYers, never remove the radiator cap until the engine has thoroughly cooled! The tightness and condition of drive belts, clamps, and hoses should be checked by a pro.
-
Oil
Change your oil and oil filter as specified in your manual more often (every 3,000 miles) if you make frequent short jaunts, extended trips with lots of luggage, or tow a trailer.
-
Engine Performance
Replace other filters (air, fuel, PCV, etc.) as recommended more often in dusty conditions. Get engine drive-ability problems (hard starts, rough idling, stalling, diminished power, etc.) corrected at a good shop.
-
Windshield Wipers
A dirty windshield causes eye fatigue and can pose a safety hazard. Replace worn blades and get plenty of windshield washer solvent.
-
Lights
Inspect all lights and bulbs; replace burned out bulbs; periodically clean dirt and insects from all lenses. To prevent scratching, never use a dry rag.
-
Tires
Have your tires rotated about every 5,000 miles. Check tire pressures once a month; check them while they’re cold before driving for any distance. Don’t forget to check your spare as well and be sure the jack is in good condition. Examine tires for tread life, uneven wearing, and cupping; check the sidewalls for cuts and nicks. An alignment is warranted if there’s uneven tread wear or if your vehicle pulls to one side.
-
Brakes
Brakes should be inspected as recommended in your manual, or sooner if you notice pulsations, grabbing, noises, or longer stopping distance. Minor brake problems should be corrected promptly.
-
Battery
Batteries can fail any time of year. The only accurate way to detect a weak battery is with professional equipment. Routine care: Scrape away corrosion from posts and cable connections; clean all surfaces; re-tighten all connections. If battery caps are removable, check the fluid level monthly.Avoid contact with corrosive deposits and battery acid. Wear eye protection and rubber gloves.
-
Emergencies
Carry some basic tools — ask a technician for suggestions. Also include a first aid kit, flares, and a flashlight.
Source: National Institute for Automotive Service Excellence (ASE).
Severe weather can be both frightening and dangerous for automobile travel. Motorists should know the safety rules for dealing with winter road emergencies.
AAA recommends the following winter driving tips:
- Avoid driving while you’re fatigued. Getting the proper amount of rest before taking on winter weather tasks reduces driving risks.
- Never warm up a vehicle in an enclosed area, such as a garage.
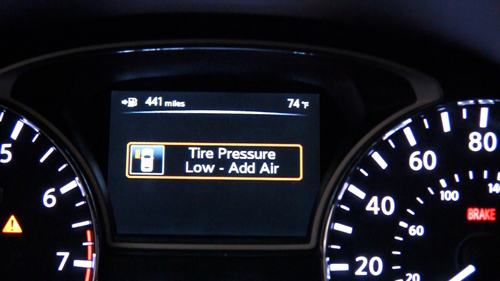
- Make certain your tires are properly inflated.
- Never mix radial tires with other tire types.
- Keep your gas tank at least half full to avoid gas line freeze-up.
- If possible, avoid using your parking brake in cold, rainy and snowy weather.
- Do not use cruise control when driving on any slippery surface (wet, ice, sand).
- Always look and steer where you want to go.
- Use your seat belt every time you get into your vehicle.
Tips for long-distance winter trips:
- Watch weather reports prior to a long-distance drive or before driving in isolated areas. Delay trips when especially bad weather is expected. If you must leave, let others know your route, destination and estimated time of arrival.
- Always make sure your vehicle is in peak operating condition by having it inspected by a AAA Approved Auto Repair facility.
- Keep at least half a tank of gasoline in your vehicle at all times.
- Pack a cellular telephone with your local AAA’s telephone number, plus blankets, gloves, hats, food, water and any needed medication in your vehicle.
- If you become snow-bound, stay with your vehicle. It provides temporary shelter and makes it easier for rescuers to locate you. Don’t try to walk in a severe storm. It’s easy to lose sight of your vehicle in blowing snow and become lost.
- Don’t over exert yourself if you try to push or dig your vehicle out of the snow.
- Tie a brightly colored cloth to the antenna or place a cloth at the top of a rolled up window to signal distress. At night, keep the dome light on if possible. It only uses a small amount of electricity and will make it easier for rescuers to find you.
- Make sure the exhaust pipe isn’t clogged with snow, ice or mud. A blocked exhaust could cause deadly carbon monoxide gas to leak into the passenger compartment with the engine running.
- Use whatever is available to insulate your body from the cold. This could include floor mats, newspapers or paper maps.
- If possible run the engine and heater just long enough to remove the chill and to conserve gasoline.
Tips for driving in the snow:
- Accelerate and decelerate slowly. Applying the gas slowly to accelerate is the best method for regaining traction and avoiding skids. Don’t try to get moving in a hurry. And take time to slow down for a stoplight. Remember: It takes longer to slow down on icy roads.
- Drive slowly. Everything takes longer on snow-covered roads. Accelerating, stopping, turning – nothing happens as quickly as on dry pavement. Give yourself time to maneuver by driving slowly.
- The normal dry pavement following distance of three to four seconds should be increased to eight to ten seconds. This increased margin of safety will provide the longer distance needed if you have to stop.
- Know your brakes. Whether you have antilock brakes or not, the best way to stop is threshold breaking. Keep the heel of your foot on the floor and use the ball of your foot to apply firm, steady pressure on the brake pedal.
- Don’t stop if you can avoid it. There’s a big difference in the amount of inertia it takes to start moving from a full stop versus how much it takes to get moving while still rolling. If you can slow down enough to keep rolling until a traffic light changes, do it.
- Don’t power up hills. Applying extra gas on snow-covered roads just starts your wheels spinning. Try to get a little inertia going before you reach the hill and let that inertia carry you to the top. As you reach the crest of the hill, reduce your speed and proceed down hill as slowly as possible.
- Don’t stop going up a hill. There’s nothing worse than trying to get moving up a hill on an icy road. Get some inertia going on a flat roadway before you take on the hill.
- Stay home. If you really don’t have to go out, don’t. Even if you can drive well in the snow, not everyone else can. Don’t tempt fate: If you don’t have somewhere you have to be, watch the snow from indoors.
Source: http://exchange.aaa.com/safety/roadway-safety/winter-driving-tips/
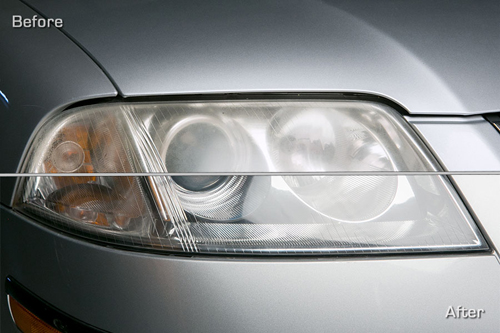
Cars get old and if you’re part of the vast majority of Americans who own a set of wheels at least 11 years old, we’re pretty sure those front headlights could use a makeover. Clean headlights not only make your vehicle look like new, but they allow for safe and unobstructed travel by clearly illuminating the road ahead.
Haze, fog, smear, whatever you want to call it, there are easy ways to get rid of that plastic oxidation that fogs up your vehicle’s headlights after years and miles of driving.
There are numerous headlight restoration kits available for sale at auto parts and home improvement stores. For this story, we tested two different kits: a $25 kit from Mequiar’s and one that cost $10 from Turtle Wax. Both kits come with a cleaning-clarifying compound, wet sanding pads and a protectant sealer solution. What do you get for $15 more? The more-advanced Meguiar’s kit provides a clean microfiber detailing cloth, an ergonomic hand grip for the wet sanding pads and a polishing buffing ball that mounts to a drill. The cheaper Turtle Wax kit came with two solutions and a numbered set of sanding pads.
What you need:
- Headlight restoration kit
- Car wash solution, window cleaner or a spray bottle with cold water
- Masking or painters tape
- Power drill (optional depending on the restoration kit)
- Dry towels or detailing cloths
- Elbow grease and patience
Steps:
1. Clean the headlight area with soap and water to remove surface-level dirt and debris. Windex or a household glass cleaner can also do the trick. Make sure the headlights are completely dry, and then move to Step 2.
2. Once dry, tape off the surrounding areas near the headlights (any of the car’s painted body panels that touch the headlights). This is an important precaution as it prevents sanding damage to your car’s paint during the restoration process.
Some headlight restoration kits, like the Turtle Wax one we used, will require you to apply a coat of clarifying compound to the headlamp assembly before any wet sanding is done.
Other headlight restoration kits may skip the sanding needed in Steps 3-5 and instruct you to just begin polishing.
3. Both headlight restoration kits provided a few different grits or strengths of sandpaper to use. Using a spray bottle filled with water or a provided lubrication liquid, dose the headlight and get the lowest number piece of sandpaper wet.
4. In a side-to-side motion, rub with pressure the lowest number (1,000 or 1) sandpaper piece across the headlight’s surface, being careful not to touch any other part of the car’s body. You want to create a full “glazed” look that covers the headlight assembly. Always keep the sandpaper piece and the headlight assembly wet with water.
5. Move on to the next highest number (2,000 or 2) grit of sandpaper, and rub across the headlight in an opposite up-and-down motion. Continue, unless instructed otherwise, to keep the sandpaper and headlight assembly wet.
The Turtle Wax kit (shown above) came with two more levels of sandpaper at finer grits, leading to more sanding. These small pads required more effort to use but were also able to tackle the curved areas of the headlights better than the Meguiar’s kit (shown below).
Steps 3-5 can take anywhere from 10-30 minutes depending on how cloudy the headlights are. Be patient and be careful not to accidentally touch the applicator to any other part of your car. Scratches and paint damage may occur.
6. Dry the headlight lens assembly with a paper towel or detailing cloth.
7. Apply a dab of the provided polisher liquid or paste to an applicator pad or buffing ball (like the one included in the Meguiar’s kit shown above). Using the applicator pad or buffing ball, pan continuously back and forth over the headlight to clear up the wet-sanded glaze. You should be able to see a difference in the clarity of your vehicle’s headlight(s) almost immediately. Again, the buffing ball didn’t tackle the curved surfaces of the headlights as well as the Turtle Wax kit.
8. Dry the headlight lens assembly with a paper towel or detailing cloth.
9. Once you are satisfied with the improved look of your headlights, finish the job by pouring a conservative amount of sealer protectant onto a separate applicator pad or towel — or in the case of the Turtle Wax kit (top image above), a small towelette with the protectant already applied — and rub it over the headlights.
10. Remove the tape around the headlights and you’re done. Make sure to let the sealant sit for a few hours, if possible, to allow everything to dry and seal, ensuring a new, protective cover.
This process isn’t just for headlamps. You can repeat the process on vehicle taillights, side markers or plastic fog lamps. Do not use these products on glass.
While both kits provided noticeable improvement in headlight clarity, the cheaper Turtle Wax kit did a superior job eliminating haze and discoloration from the entire lens, despite there being more laborious steps throughout the wet sanding and polishing processes. Even though the more-advanced Meguiar’s kit was quicker and more ergonomically pleasing, Turtle Wax’s basic $10 kit was our shining winner thanks to some good-old elbow grease.
The cost savings of doing this type of work yourself is also significant. Independent body shops will charge around $60 to restore your vehicle’s headlights, while one Chicago area Volkswagen dealership quoted us $100 to do the work.
*While we hope to help, MetrotechCollision.com is not responsible for any damage that may occur to your vehicle by following the steps above.
Source: Cars.com
Actually, there is no such thing as a tuneup in the traditional sense of replacing parts to bring the ignition and fuel systems up to specs for maximum performance and efficiency, and there hasn’t been for years.
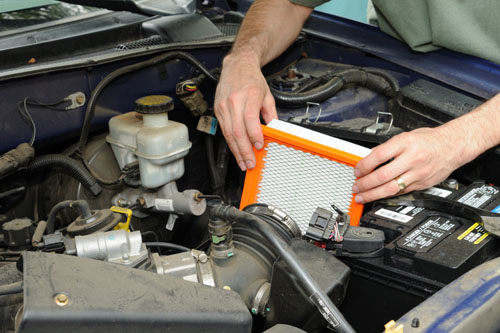
About the only things left from the traditional tuneup are new spark plugs, which is typically done every 100,000 miles, and replacing the air filter periodically. The federal EPA and Department of Energy say that replacing a clogged air filter will not improve gas mileage but can improve acceleration 6% to 11%. The agencies do not say what benefit can be derived from fresh spark plugs, but computers that control today’s engines adjust the air-fuel mixture and spark timing to compensate for wear, such as when the electrodes on spark plugs are worn down.
Even so, some car owners still dutifully take their car in periodically to have it “tuned up.” Instead, service technicians will inspect and perhaps test the fuel, ignition and emissions systems to look for faulty vacuum hoses, oxygen sensors and other parts that can hurt performance. The federal government, for example, says a bad oxygen sensor can give engine computers false readings and reduce fuel economy as much as 40%.
Having your vehicle serviced and inspected periodically is a good way to extend its life and keep it operating efficiently. However, walking into a repair facility and asking for a tuneup is a bad idea because it indicates you’re still living in the previous century and have extra money you would like to spend. Some in the auto-repair business will take advantage of those opportunities.
Look in the owner’s manual for your vehicle (or separate maintenance schedule) to find what the manufacturer recommends, and see if you can even find the words “tuneup.” For example, we looked at the maintenance guide for the Ford Fiesta that also applies to other Ford vehicles. The first mention of anything related to a traditional tune-up was to replace the engine air filter every 30,000 miles. The only other related item was to replace the spark plugs every 100,000 miles.
Source: Cars.com
While it may seem like a mundane task, inflating tires is much more crucial to your car than you may think, and it results in a safer and more economical experience on the road. Your vehicle’s handling also will be greatly improved as the larger a tire’s inflated footprint, the more responsive and comfier the ride balance will be.
Because it’s National Tire Safety Week, it’s the perfect time to check your car’s tires.
Before starting
To find your tires’ proper inflation level, look for a sticker on the driver-side doorjamb. It displays the vehicle weight restriction and tire information. The info is also found in the maintenance or car-care section of your vehicle’s owner’s manual.
Don’t refer to the sidewall markings on your tires, which in part specify the maximum tire pressure — not the recommended pressure.
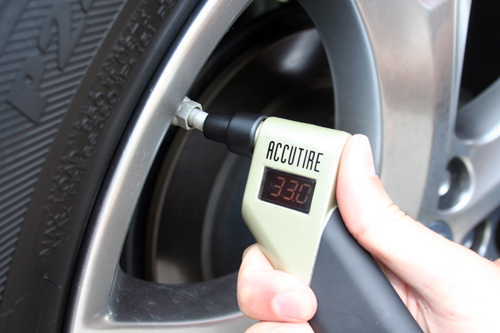
Unless your tire is visibly flat, don’t judge tire inflation just by looking at it; you have to use a tire pressure gauge to get the correct pounds per square inch reading. There are three types of tire-pressure gauges: digital, internal slide and dial. Prices range from $5 for a basic gauge to more than $30 for one that is digital, has an air-release button — or even talks. All will do the job, but you may want to consider the conditions in which you’ll be using your gauge. “We’ve found that low-cost digital pressure gauges are very accurate and maintain the accuracy longer, but in extremely cold temperatures the gauge may not show up properly,” said John Rastetter, Tire Rack’s director of tire information services.
Tips for checking and filling your tires
Tire manufacturers suggest checking tires when they’re cold for the most accurate reading. Outside temperatures can cause tire pressure to vary by as much as 1 psi per 10 degrees; higher temperatures mean higher psi readings. “Tires are black; what does black do? Attract heat,” Rastetter said, noting the importance of finding a shady place to check and fill all four tires.
Temperature plays a huge part in tire psi, Rastetter said, adding that the most crucial time of year to check pressure is in fall and winter when days are shorter and average temperatures plummet.
Check your tires in the morning before going anywhere, because as soon as you get behind the wheel for an extended amount of time, psi will rise. Rastetter said that if you’ve been on the road a long time and notice higher psi in your tires, don’t let the air out, as the increase in pressure has built up due to the warm, constantly-in-motion tires
What to do
1. Pull your car onto a level surface in the shade.
2. Remove dust caps from the tires’ valve stems.
3. Using your tire gauge, firmly press the tip of the gauge straight on to the tire’s valve stem for a brief moment.
4. The tire gauge should provide a psi reading; if the number seems unrealistically low or high — for example, 85 psi or 1 psi – you will need to repeat the previous step, ensuring that the tire gauge’s tip is properly making contact with the valve stem.
5. If the tire gauge’s recorded reading is higher than the manufacturer-recommended rating, press the gauge tip on the valve stem until you hear air leak out. Check the tire pressure again.
6. If the reading is lower than recommended, fill the tire with air by firmly pressing the air-hose tip onto the valve stem. You will hear air quietly enter the tire. If you hear air leaking or spraying out, you need to double-check that the connection between the air hose and the tire’s valve stem is secure.
7. When you think you’ve added or let out enough air, check the pressure a few times with the gauge.
8. Replace the valve dust caps. Rastetter emphasized the importance of keeping dust caps on during winter driving because if water gets into the valve stem and freezes inside the tire, it could cause a flat.
While you’re at it, check your spare tire’s pressure. You don’t want to have a flat tire and then find out your replacement is flat, too.
Make these steps part of your routine. It will benefit your vehicle and your wallet.
Source: Cars.com
Car Care Tips from the Pros Prepare You for Fall and Winter Driving
 It’s foolhardy to head out in a poorly maintained vehicle in the dead of winter, of course, but even vehicle owners in temperate zones need a car care check as the days grow shorter, note the pros with the nonprofit National Institute for Automotive Service Excellence (ASE), an independent group that tests and certifies the competence of auto technicians.
“Regular, routine maintenance can help improve your gasoline mileage, reduce pollution, and catch minor problems before they become big headaches,” says Tony Molla, vice president of communications at ASE. ASE offers these car care tips to give you peace of mind during fall and winter driving:
- Before you do anything else, read your owner’s manual and follow the manufacturer’s recommended service schedules.
- Get engine performance and drive-ability problems — hard starts, rough idling, stalling, diminished power, etc. — corrected at a reputable repair shop that employs ASE-certified repair professionals. Cold weather makes existing problems worse.
- Replace dirty filters, such as air, fuel, and PCV. A poorly running engine is less efficient and burns more gasoline.
- As the temperature drops below freezing, add a bottle of fuel deicer in your tank once a month to help keep moisture from freezing in the fuel line. Keeping the gas tank filled also helps prevent moisture from forming.
- Change your oil and oil filter as specified in your manual — more often if your driving is mostly stop-and-go or consists of frequent short trips. A poll of ASE Master Auto Technicians revealed that regular oil and filter changes is one of the most frequently neglected services, yet one that is essential to protect your engine.
- The cooling system should be flushed and refilled as recommended. The level, condition, and concentration of the coolant should be checked periodically. A 50/50 mix of antifreeze and water is usually recommended. Do-It-Yourselfers: Never remove the radiator cap until the engine has thoroughly cooled! The tightness and condition of drive belts, clamps, and hoses also should be checked regularly by a professional technician.
- The heater and defroster must be in good working condition for passenger comfort and driver visibility.
- Replace old blades regularly. If your climate is harsh, purchase rubber-clad (winter) blades to fight ice build-up. Stock up on windshield washer solvent — you’ll be surprised how much you use during the winter months. And don’t forget to always carry an ice scraper.
- Have your battery checked. The only accurate way to detect a weak battery is with professional equipment. However, most motorists can perform routine care: Wear eye protection and protective rubber gloves. Scrape away corrosion from posts and cable connections; clean all surfaces; retighten all connections. If battery caps are removable, check fluid level monthly. A word of caution: Removal of cables can cause damage or loss of data/codes on some newer vehicles, so always check your owner’s manual first. Be sure to avoid contact with corrosive deposits and battery acid.
- Inspect all lights and bulbs. Replace burned out bulbs; periodically clean road grime from all lenses. To prevent scratching, never use a dry rag. Clouded lenses can be refinished by many service outlets or by using a DIY kit found in major auto parts outlets.
- Exhaust fumes inside your vehicle’s cabin can be deadly. Have the exhaust system examined for leaks and problems while the vehicle is on a lift. The trunk and floorboards should also be inspected for small holes.
- Worn tires are dangerous in winter weather. Examine tires for remaining tread life, uneven wearing, and cupping; check the sidewalls for cuts and nicks. Check tire pressure once a month, letting the tires “cool down” before checking the pressure. Rotate as recommended. Don’t forget to check your spare, and be sure the jack is in good working condition. Under-inflated tires or poorly aligned wheels makes your engine work harder and thus use excess gasoline.
- Have your brakes checked periodically for safety and to prevent costly repairs that can be caused by neglect.
- The transmission is often neglected until a major failure. Routine checks and fluid changes at prescribed intervals can prevent very costly repairs down the line.
- Always carry an emergency kit with you: extra gloves, boots and blankets; flares; a small shovel and sand or kitty litter; tire chains; a flashlight and extra batteries; and a cell phone and extra car charger. Put a few “high-energy” snacks in your glove box.
The National Institute for Automotive Service Excellence (ASE) was founded in 1972 as a nonprofit, independent organization dedicated to improving the quality of automotive service and repair through the voluntary testing and certification of automotive technicians. ASE-certified technicians wear blue and white ASE shoulder insignia and carry credentials listing their exact area(s) of certification. Their employers often display the blue and white ASE sign.
For more information, including seasonal car care tips, visit www.ase.com.
Detroit was pummeled with torrents of record-breaking rain Monday evening, stranding drivers on flooded freeways and leaving one dead.
The city received 4.57 inches of rain Monday, Detroit’s second highest on record following a rainfall of 4.74 inches in 1925, according to the National Weather Service. Some communities received more than 6 inches of rain. In contrast, the average rainfall for all of August is just 3 inches.
Rain fell throughout the day, but during afternoon commuting hours it filled local freeways. Water reached heights of 14 feet on certain roadways, according to the Detroit News, forcing some drivers to abandon their cars and prompting the Michigan State Police to send divers to look at the freeways.
Flash flooding has also resulted in that familiar and unfortunate sight of swamped cars. Remember: Never try to cross or drive on a flooded roadway. Even a couple feet of water is enough to sweep away your vehicle — and you with it. But if you do find yourself trapped in a flooded vehicle, MetrotechCollision.com reiterates the following important safety tips:
Do
- Stay calm. You’ll need your wits about you.
- Turn on your headlights and hazard lights. This will make it easier for emergency personnel to see you.
- Unbuckle your seat belt.
- Unlock your doors.
- Take jackets and outer clothing off.
- Lower your window. Most electric windows should work unless the car is completely submerged in water.
- If you can lower the windows, do so, but slowly. Climb out. Get to high ground and call 911.
- If the windows will not open, you’ll have to use a door to get out. But you won’t be able to open a door until the water pressure is equalized between the outside and the inside of the car. This means you’ll have to wait for water to enter the car and fill up to about your neck level (this sounds terrifying, but this is the only way the doors will open).
- Once the doors are open, tread water and swim to safety; call 911.
Don’t
- Do not panic.
- Do not use your energy trying to open the doors because water pressure will keep them from budging (wait for the pressure to equalize).
- Do not try to save your possessions.
- Do not try to break windows to get out. If water pressure has not equalized, glass will explode inward toward you or other occupants.
- Once out, do not stay with your car. Get to high ground.
- Do not stand on the roof of your car. If your car is swept away, you’ll be carried away with it. You could also fall and injure yourself if the car shifts abruptly.
- Do not return to your car if you think the water level is going down. Water levels could rise without warning. Allow emergency personnel to tow your vehicle to a safe place.
Are you hoping that your car lasts forever? While this may not be possible, there are steps you can take to prolong its life. By doing so, you will find yourself saving a lot of money along the way.
Here are five tips to make your car last longer:
1. Change your car’s oil and filter on a regular basis. This is discussed time and time again, however, some continually overlook the importance. Read your owner’s manual for more information on how often you should do this, and then stick to the schedule no matter what.
2. Keep an eye on your tires. Did you know that over or under-inflated tires can have an impact on many parts of your car? On top of this, it can impact the actual tires as well as your gas mileage.
3. Visit a mechanic on a regular basis. Just because you don’t see something on the surface doesn’t mean there is nothing wrong with your car. A well qualified mechanic can pinpoint potential problems before they turn into serious and costly repairs.
4. Be observant. When was the last time you gave your car a good “once over?” You don’t have to spend hours on end inspecting your car, but it never hurts to take a few minutes to walk around your car and see if anything sticks outs.
5. Keep your car clean. Believe it or not, regularly washing and waxing your vehicle will increase its lifespan. No matter if you do it yourself or drive through a carwash, you are getting the same benefit.
By following these five tips, you will find it much easier to extend the life of your vehicle. And that is what you want, right?
Most people understand that regular car maintenance is critical to ensuring the safety and reliability of their vehicle. But did you know that this can also save you money? From following regular service intervals to visiting your mechanic when something fishy is going on, the more proactive you are the better chance you have of saving money down the road.
Here are five ways regular maintenance can save you money:
1. Fix small, inexpensive problems before they grow into something bigger. A $100 repair today could save you from spending thousands tomorrow. Is this a tradeoff you are willing to make?
2. Uncover other problems. During a regular inspection, your mechanic may find a problem that you were unaware of. By doing so, this issue can be taken care of immediately, ensuring that you don’t face a bigger problem later on (see #1 above).
3. Save money on towing. The last thing you want is to be stranded on the side of the road, forced to call a tow truck for assistance. With the proper maintenance schedule, there is less of a chance that your vehicle will need towed.
4. Save money on labor. Did you know that regular maintenance typically requires less time than an advanced repair? You are going to be charged by the hour in most cases, so you want to avoid advanced repairs if at all possible.
5. Tips from your mechanic. At Metrotech, we do our best to provide clients with information and advice on how to keep their vehicle in good condition. With a regular maintenance schedule, you will always have time to consult with a qualified professional. Subsequently, you can implement this advice to avoid future problems.
Now do you see why regular car maintenance is so important? Not only can this save you money, but it can help you avoid a lot of stress.

There is no better feeling than hitting the open road during the summer months. It does not matter of you are going on a road trip or simply doing some errands, it can be a lot of fun to get behind the wheel in nice weather (especially after a cold winter).
Unfortunately, extreme heat can take a toll on your vehicle.
Here are three of the most common summertime car problems to be aware of:
1. Engine overheating. Have you ever seen a car on the side of the road with its hood up? If so, there is a good chance it is overheating.
Did you know your engine is capable of reaching temperatures of more than 200 degrees Fahrenheit? If you add in extreme outdoor temperatures, it is easy to see why this is a common problem during the summer.
To protect against this, make sure you maintain all fluid levels, including motor oil and coolant. Along with this, keep a close watch on the temperature gauge to ensure that your engine is remaining cool.
2. Dead battery. This is another common problem in the heat. While many are aware that cold weathers can negatively impact their battery, most don’t realize that extreme heat can do the same.
Is your battery old? If so, have it tested by a qualified mechanic without delay.
3. Tire failure. As temperatures rise so does tire pressure? As a result, the chance of a blow out or accelerated deterioration is much greater.
To protect against this, make sure your tires are always properly inflated. If you find yourself adding air on a regular basis, your tire may have a leak that requires attention.
These are three of the most common summertime car problems. If you are worried about running into one or more of these issues, proper maintenance can go a long way in keeping your vehicle on the road and out of your mechanic’s garage.

